Creating a threaded hole is a crucial process in various industries, including manufacturing, engineering, and construction. A threaded hole is a hole that has been threaded to accept a screw or bolt, allowing for secure fastening and integration of components. In this guide, we will walk you through the process of creating a threaded hole, highlighting the key considerations and techniques involved.
Understanding the Importance of Threaded Holes
Threaded holes play a vital role in the assembly of complex systems and structures. By providing a secure means of fastening, threaded holes ensure that parts remain in place, even under stress or vibration. This is particularly critical in industries where the reliability and durability of components are essential.

Preparing the Material
Before creating a threaded hole, it is essential to prepare the material. This involves selecting the correct material, ensuring it is free from defects, and cleaning the surface to prevent any debris or contaminants from interfering with the threading process. The material should also be properly aligned and secured to prevent any movement during the threading process.
Drilling the Pilot Hole
The first step in creating a threaded hole is to drill a pilot hole. This involves using a drill bit to create a small hole in the material, which will serve as a guide for the tap. The pilot hole should be slightly smaller than the desired thread size to ensure accurate threading. The drill bit should be carefully selected to match the material and thread size.
Tapping the Hole
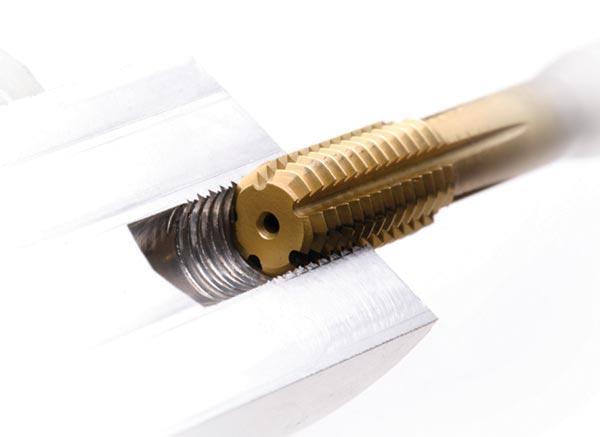
Once the pilot hole has been drilled, the next step is to tap the hole. This involves using a tap, a specialized tool designed to cut threads into the material. The tap should be carefully selected to match the thread size and material. The tapping process requires careful consideration of several factors, including the type of material, thread size, and pitch.
Thread Cutting
During the tapping process, the tap cuts threads into the material, creating a threaded hole. The thread cutting process requires careful control to ensure accurate threading and prevent damage to the material. The tap should be advanced slowly and carefully, with gentle pressure, to avoid damaging the threads.
Thread Forming
In some cases, thread forming may be used instead of thread cutting. This involves using a specialized tool to form threads without cutting. Thread forming is often used for materials that are prone to thread damage or breakage.
Final Inspection and Testing
Once the threaded hole has been created, it is essential to conduct a final inspection and testing to ensure that the threads are accurate and free from damage. This involves visually inspecting the threads, checking for any defects or damage, and testing the threads with a screw or bolt to ensure they are secure.

Common Challenges and Considerations
Creating a threaded hole can be a complex process, requiring careful consideration of several factors. Common challenges include selecting the correct material, ensuring accurate threading, and preventing damage to the material. Additionally, tapping can be a time-consuming process, particularly for large or complex parts.
Conclusion
Creating a threaded hole is a critical process that requires careful consideration of several factors. By understanding the key considerations and techniques involved, you can ensure the creation of accurate and secure threaded holes. Whether you are working in manufacturing, engineering, or construction, the ability to create threaded holes is an essential skill that can help you achieve your goals. By following the guidelines outlined in this guide, you can create high-quality threaded holes that meet your needs and ensure the reliability and durability of your components.